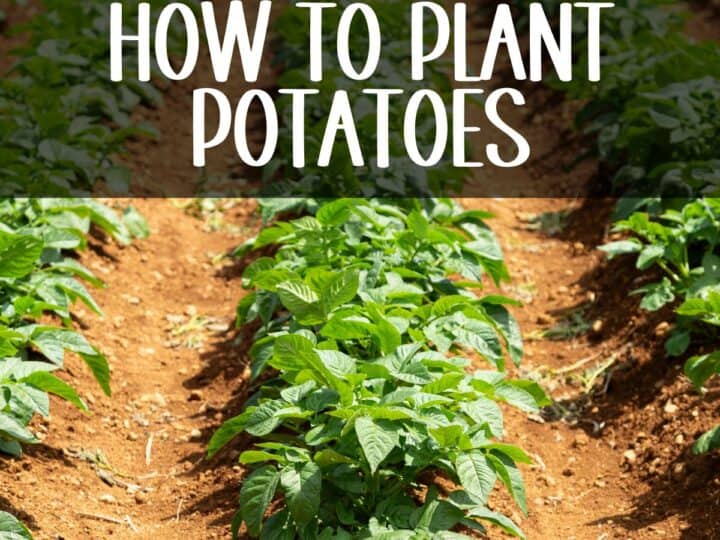
How to Grow Garlic in Southern California

There is nothing quite like the flavor of homegrown garlic—it is fresher, richer, and far more aromatic than anything you can pick up at a supermarket. While the vast majority of garlic sold in stores travels thousands of miles from China and is often treated with sprout inhibitors or irradiated, the bulbs you grow in your own backyard are pure, local, and bursting with a complex flavor that mass-produced cloves cannot match.
For Southern California gardeners, it can be a challenge knowing how to grow garlic properly to yield those fat, juicy heads.
Believe it or not, our mild, marine-influenced climate provides a unique advantage for cultivating this ancient "stinking rose". Garlic is considered a garden "ace"—a high-value crop that, while requiring a commitment of eight to nine months in the soil, offers an incredible return on investment through its culinary versatility and long storage life.
Beyond the kitchen, garlic acts as a natural guardian for your landscape, using its pungent aroma to ward off pests while offering powerful antibacterial and antiviral health benefits for your family.
Whether you are looking to reclaim your food source or simply want to pull a "honkin'" head of garlic from your own soil, this guide will show you how to master the art of growing garlic in the unique conditions of Southern California.
Selecting the Right Variety of Garlic for SoCal

Garlic is widely considered a garden “ace” because it is a high-value crop that offers a massive culinary return for any home chef. While it requires a significant time commitment—typically taking eight to nine months to reach full bulb maturity—it is well worth the wait.
Because it occupies garden beds for the majority of the year, it is best to treat it as a priority plant that serves as a cornerstone of your home food production. Beyond its immediate use in the kitchen, garlic is incredibly versatile, as it can be enjoyed raw, sautéed, or even processed into a long-lasting, flavorful powder. It also boasts excellent storage potential, allowing you to rely less on the grocery store by keeping your pantry stocked for months.
Southern California gardeners possess a unique climatic advantage for cultivating this pungent allium. Garlic performs at its absolute peak in mild, dry climates where the tops can grow vigorously throughout the entire cool season.
Our region's typically dry spring weather is a major benefit, as it significantly reduces the risk of fungal rots occurring in the ground before the bulbs are ready for lifting. When your planting is timed correctly to align with these seasonal shifts, these conditions result in both the highest possible yields and a crop of superior quality.
The most compelling reason to grow your own, however, is the incredible flavor gap between homegrown cloves and those found in the produce section. Most supermarket garlic is imported from China and is often treated with growth inhibitors or irradiated to prevent it from sprouting while in transit or on the shelf.
Homegrown garlic, by comparison, is far fresher and offers a richer, more complex flavor profile that can range from gentle and sweet to intense and pungent. Furthermore, cultivating your own allows you to harvest gourmet delicacies like garlic scapes—the curly flower stalks produced by certain varieties that are prized by chefs but almost never found in retail stores.
Choosing the right variety is the first step toward a bountiful harvest, and for gardeners in the mild climate of Southern California, your choice will determine how well your crop develops. Garlic is generally split into two main families: softneck and hardneck.
Softneck Garlic: The Definitive SoCal Champion
For Southern California's mild winters and Zone 10 and above climate, softneck garlic is the definitive choice.
The two primary groups of softneck garlic include:
- Artichoke Varieties: These produce large bulbs with multiple overlapping layers of cloves and store exceptionally well.
- Silverskin Varieties: Known for their white, papery wrappers, these are the best for long-term storage and are the easiest to braid.
Softneck varieties I love, such as ‘California Early’, ‘Silver White’, and ‘Silver Rose’, are highly recommended for California gardens because they thrive in warmer regions and do not require the intense winter cold that other varieties do.
These bulbs typically produce 12 to 16 cloves per head and are prized for their incredible storage life, often remaining fresh for up to a full year under the right conditions.
Another major advantage for the home cook is their pliable, flimsy stems, which make them ideal for braiding into cozy yet functional kitchen decor.
Hardneck Garlic: The Gourmet Challenge
On the other hand, hardneck garlic is a bit of a high-maintenance guest in a mild climate - but it can be done!
These varieties naturally prefer cold winters for vernalization, a chilling period necessary to stimulate proper bulb formation and division. Hardnecks are beloved by chefs for their large, easy-to-peel cloves and their "bonus" harvest of scapes—delicious curly flower stalks that emerge in early summer.
If you are a SoCal gardener like me who wants to grow hardneck favorites like ‘Red Russian’ or ‘Chesnok Red’, you can still succeed by using a simple "fridge hack".
To simulate winter, place your hardneck cloves in a plastic bag in the refrigerator at approximately 40°F for one to two months before planting, usually in September through October.
This pre-chilling tricks the garlic into thinking it has experienced a traditional cold season, enabling it to bulb up properly once it hits the ground - believe me, it's well worth the wait and fridge space!
A Warning on Supermarket Garlic
Regardless of the variety you choose, always source your "seed" from certified disease-free bulbs found at reputable nurseries or specialty seed catalogs. It is tempting to simply plant a bulb from the produce section, but most supermarket garlic is treated with growth inhibitors to prevent sprouting.
Store-bought garlic is often a variety specifically suited to different climates, such as those in China, and may not perform well in your local soil.
For the best results, start with high-quality planting stock that is adapted to our unique region. My favorite sources are Keene Garlic and Territorialseed.com.
Specific Heat-Tolerant Varieties
Here are a few other varieties noted for their performance in mild or hot climates:
- 'Lorz Italian': This heirloom softneck is specifically noted for its ability to adapt easily to hot summers.
- 'Early Italian Purple' (or 'Early Red Italian'): Highly recommended for mild climates, this variety matures earlier than most and features attractive purple-streaked bulbs.
- 'Inchelium Red': A mild, robustly flavored softneck that adapts well to different climates and has won national taste tests.
- Creole Varieties: Often classified as a type of hardneck that can behave like a softneck, Creole varieties like 'Rose de Lautrec' are often better suited for southern latitudes than other hardnecks.
The Elephant in the Garden
Although Elephant Garlic looks like a massive head of garlic, it is technically a variety of leek.
It is easy to grow in mild climates like sones 9 and 10 and is a great choice for beginners because it is guaranteed to produce a crop of massive, mild-flavored, easy-to-peel cloves.
However, be aware that it can produce small cormlets at the base that may resprout the following year if not thoroughly harvested - totally not an issue in my book but some may not want them to resprout.
Why "Seed" Quality Really Matters
Selecting the right "seed" (cloves for planting) is about more than just variety; it is about preventing long-term soil contamination.
- Disease Prevention: Sourcing from reputable suppliers ensures you aren't introducing tenacious pathogens like White Rot or Fusarium Basal Rot into your soil, which can persist for years and prevent you from growing any Alliums (onions, leeks, or garlic) in that bed for up to eight years.
- Clove Size: When selecting your planting stock, prioritize the largest cloves. The size of the clove you plant has a direct impact on the eventual size of the bulb you harvest.
Preparing Your Southern California Soil for Growing Garlic
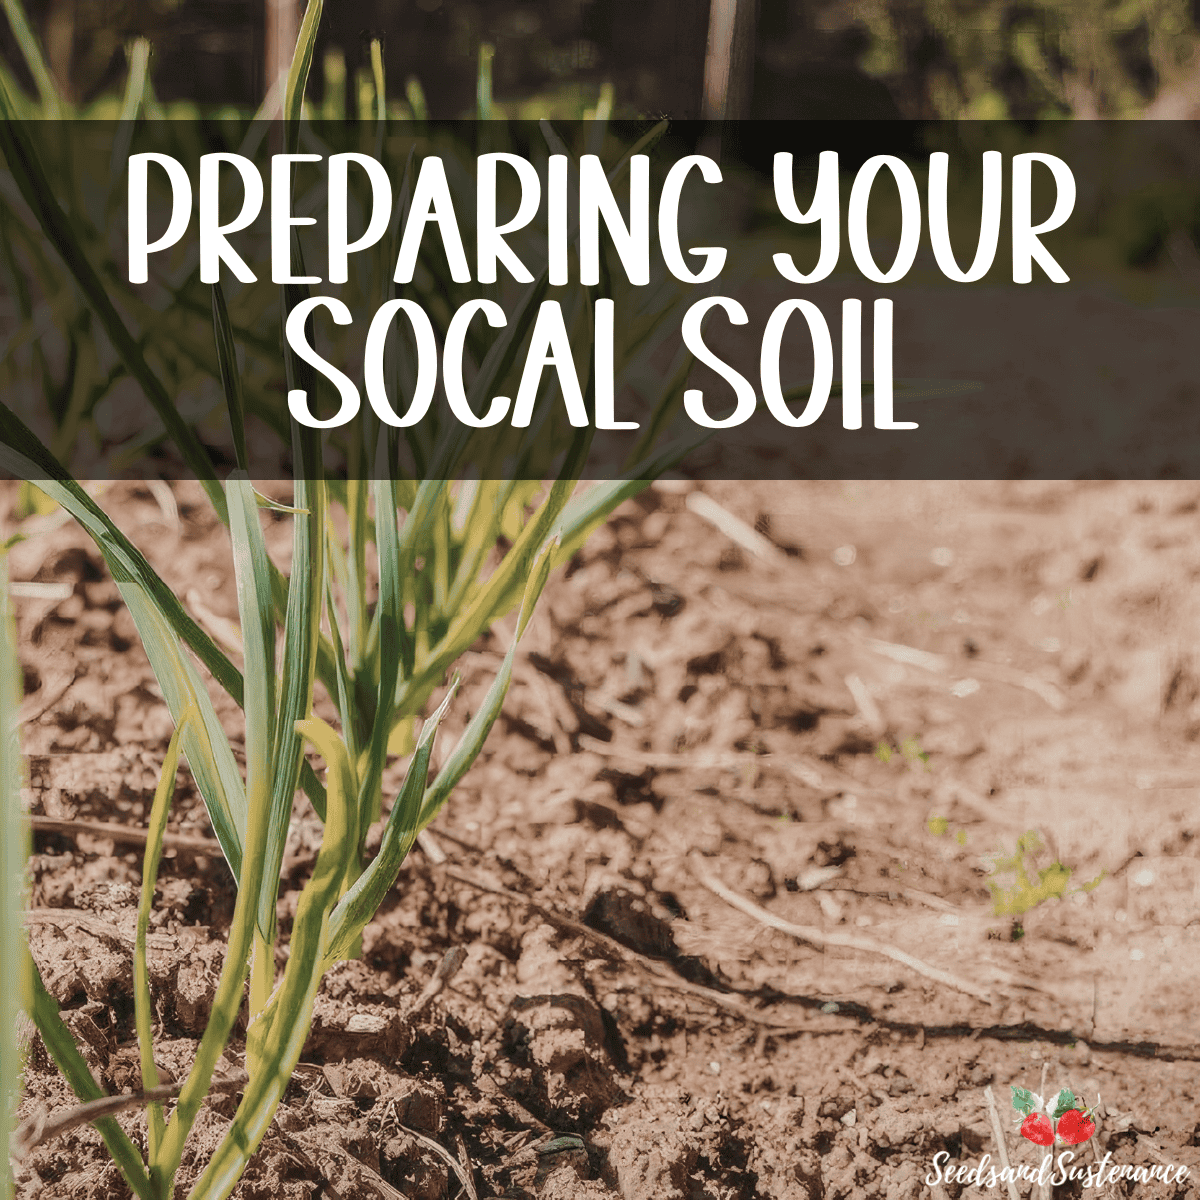
Western soils, including those in California, are often less developed than those on the East Coast because lower rainfall results in less water percolating through the earth.
Consequently, California soils naturally contain higher levels of calcium, potash (potassium), and phosphate. The clay types predominant in our region also have a higher capacity to hold onto nutrients than soils in the humid Southeast.
However, the semiarid climate can lead to the accumulation of soluble salts in the root zone as water evaporates from the surface, sometimes appearing as a whitish crust.
To manage this, you should keep high-salt soil evenly moist to minimize osmotic stress on roots, and occasionally irrigate with excess water to wash those salts below the root zone.
Advanced Garden Bed Preparation Techniques
For gardeners dealing with heavy clay or compacted "hardpan" common in some SoCal areas, double digging can be used to prepare the soil up to 24 inches deep, ensuring a loose environment for bulbs.
You can also use one of my favorite garden tools - a broadfork (also known as a gre-linette) to aerate the soil without turning it over, which keeps the delicate soil structure intact while allowing roots to spread downward.
Using other specialized tools like a Hori Hori knife, can also help you measure depth and spacing with precision during the preparation and planting phase.
Cultivating a Living Soil Microbiome
Preparation isn't just about chemistry; it's about biology and getting all of those good microbes in your soil.
Adding mycorrhizal fungal spores or propagules to the soil during preparation can help your garlic plants access nutrients and water more effectively.
You might also want to consider incorporating worm castings, which provide both immediate nutrients and a diverse community of beneficial microorganisms.
Other high-value amendments for prep include kelp meal for trace minerals and alfalfa meal, which acts as a soil conditioner and contains plant growth hormones.
Strategic Garden Planning
Since garlic is a long-term crop that will occupy its bed from October/November until June, you should consider its placement within your garden layout.
Planting garlic in the corners or the back of a garden bed is often recommended so that when you harvest it in early summer, you aren't left with a "huge hole" in the middle of your primary aesthetic display.
Keep in mind, if you add elemental sulfur to lower your soil pH (garlic thrives in a slightly acidic to neutral soil pH of 6.5 to 7.0), be aware that this process is mediated by soil microorganisms and can take several months to show results, so it is best to apply it well in advance of planting.

Advanced Garlic Selection and Handling
- The "Paper" Rule: While you should divide the bulbs, always leave the individual papery cover on each clove. Removing this skin makes the cloves significantly more susceptible to rotting once they are in the soil.
- Speeding Up Sprouting: If you want your garlic to sprout faster, you can remove only the very outermost loose peel of the bulb before dividing, but ensure the skin tight to the clove remains intact.
- Seed Integrity: Always inspect your cloves for any signs of rot or discoloration before planting; if you observe any issues, do not plant them, as pathogens like White Rot or Fusarium Basal Rot can contaminate your soil for up to eight years.
Refined Planting Techniques
Here's how to make doubly sure your garlic is planted properly:
- The "Butt" End: In addition to planting the pointy side up, ensure the flattened "butt" end is firmly in contact with the soil at the bottom of the hole to encourage immediate root engagement.
- Precision Tools: Using a Hori Hori knife or a marking dibbler can help you maintain a consistent depth of 2 to 3 inches and ensure your spacing is accurate.
- Immediate Hydration: Give your tucked-in cloves a generous watering immediately after backfilling the furrows to help the soil settle around the cloves and kickstart the establishment process.
Post-Planting Protection for Garlic
- Critical Mulching: Immediately after planting and watering, apply a 2- to 3-inch layer of organic mulch, such as weed-free straw or shredded leaves. This layer is essential for insulating the bulbs, suppressing weed competition, and keeping the soil cool during Southern California's occasional warm winter spells.
- Wildlife Defense: If squirrels or birds are a problem in your area, cover the newly planted bed with wire mesh or chicken wire until the garlic has firmly established itself.
Strategic Planning Tips
- The "Early Greens" Bonus: Don't throw away the tiny cloves from the center of the bulb. Do what I do and plant them close together in a separate corner or container to harvest as "early garlic greens"; you can snip these mild-flavored shoots to use just like green onions - they're delicious on stir fry or pesto!
- Container Gardening Hack: If you are short on space, garlic thrives in 5-gallon pots; you can fit 4 to 6 cloves in a single 12-inch diameter container. However, avoid self-watering pots, as garlic requires the superior drainage found in traditional containers to prevent bulb rot.
- The Companion "No-Go": While garlic is a great neighbor for tomatoes and strawberries, avoid planting it near peas or beans, as they are not compatible and can hinder each other's growth.
Tending Your Garlic Crop

To ensure your garlic reaches its full potential in Southern California's mild climate, you must transition from planting to a diligent maintenance routine.
Because garlic occupies your garden beds for up to nine months, consistent care is the key to harvesting those "honkin'" garlic heads.
Mulching to Create a Protective Blanket
Applying a 2-inch layer of organic mulch is one of the most beneficial steps you can take for your garlic.
In Southern California, weed-free straw or shredded deciduous leaves are the ideal materials to use.
This layer of mulch serves three vital functions:
- Moisture Retention: It significantly reduces water evaporation from the soil surface.
- Temperature Regulation: It keeps the soil and roots cool during unseasonably warm winter spells and protects them from sudden cold snaps.
- Weed Suppression: It blocks the sunlight that weed seeds need to germinate, preventing them from competing with your garlic.
So make sure you mulch, especially if you live in a colder climate.
Proper Irrigation for Garlic
Garlic requires consistent moisture to produce large, healthy bulbs, particularly during the first four months of growth.
Because our region can experience dry winters, you must monitor the soil moisture regularly.
Use the "finger test": dig down about 2 inches into the soil; if it feels dry to the touch, it is time to irrigate until the water begins to pool and soak in.
As temperatures rise in the spring, maintain the soil so it is evenly moist but never soggy, as standing water can quickly lead to bulb rot.
Crucial Tip: Gradually reduce and then completely stop watering about two to four weeks before your anticipated harvest to allow the bulbs to dry and prevent them from splitting or rotting in the ground.
Feeding: Fueling Heavy Feeders
Just like corn and okra, garlic is classified as a heavy feeder that demands significant nutrition to build large cloves.
While you should have amended your soil at planting, a springtime "boost" is essential for a high-quality harvest.
- Timing: Apply a high-nitrogen fertilizer or diluted fish emulsion in early spring when the green shoots reach approximately 6 inches in height.
- Why Nitrogen?: Nitrogen is critical for vigorous leaf growth, and the final size of your garlic bulb is directly determined by the size and health of the plant's top growth.
- Cut-off Point: Stop all supplemental feeding about a month before the plants begin bulbing, as late fertilization can lead to excessive foliage at the expense of bulb size.
Weeding: Eliminating the Competition
Weeding is absolutely critical throughout the entire growing season. Garlic has a shallow, non-aggressive root system and simply cannot compete with vigorous weeds for water, sunlight, or nutrients.
Uncontrolled weeds can significantly reduce your yields and lead to smaller produce.
When weeding, be extremely careful; use a hand-weeding technique or shallow hoeing to avoid injuring the garlic’s delicate roots. Aim to keep the area completely weed-free from the moment growth resumes in the spring until you lift your crop in the summer.
Managing Southern California Salinity
Our region’s semiarid climate often leads to the accumulation of soluble salts in the root zone as water evaporates. This can cause osmotic stress on your garlic's roots, appearing as a whitish crust on the soil surface.
To combat this, you must keep the soil evenly moist to minimize stress and occasionally irrigate with excess water to "leach" or wash those salts down below the root zone.
Natural Pest Management
While garlic's pungent aroma acts as a natural guardian against many pests, you may still encounter thrips or aphids on the green shoots.
For a Southern California garden, the most effective and non-toxic solution is simply washing them off with a sharp stream of water from your garden hose.
However, if you have those awful argintine ants like I do in your garden, you HAVE to deal with the ants first or they will keep helping and farming the aphids.
If you notice heavy infestations of thrips, you might consider using reflective mulch, which can disorient the insects and keep them away from your crop.
Boosting the Soil Microbiome
Because garlic is a "heavy feeder" that stays in the ground for nearly a year, tending to the living biology of your soil is just as important as chemical fertilization.
- Top-dressing: Periodically apply a thin layer of worm castings or well-rotted compost around the base of the plants to provide a slow release of nutrients and beneficial microorganisms.
- Compost Tea: Applying actively aerated compost tea as a soil drench or foliar spray can help garlic plants access water and nutrients more effectively while protecting against fungal pathogens.
This will ensure that you get nice large heads of garlic to harvest.
The Importance of Crop Rotation
Tending to your garlic also involves planning for the future.
Garlic belongs to the Allium genus, along with onions, leeks, and chives. To prevent the buildup of tenacious soil-borne diseases like White Rot or Fusarium Basal Rot—which can persist in Southern California soil for up to eight years—you must rotate your crops.
Never plant garlic in the same bed where other Alliums were grown in the previous three seasons.
Refining the "Stop Watering" Phase
As you approach the summer harvest, monitor your plants for "lodging" (when the tops begin to fall over).
While the general rule is to stop watering 2–4 weeks before harvest, in SoCal’s heat, you must watch carefully; if the soil becomes bone-dry too quickly, the bulbs can "shatter" or split their skins, which significantly reduces their storage life.
Aim for a gradual reduction in moisture rather than a sudden drought.
The "Bonus" Harvest: Garlic Scapes

If you have chosen to grow hardneck garlic varieties, you are in for a special treat that supermarket shoppers rarely see: the garlic scape.
These are the stiff, curly flower stalks that emerge from the center of the plant in late spring or early summer. While beautiful, they are more than just an ornamental feature; they represent a crucial management point for your Southern California crop.
The Importance of Pruning
As your garlic plants mature, they naturally attempt to reproduce by forming these flower heads. To ensure you harvest large, robust bulbs, you should snip off the scapes when they reach about six inches in length or have begun to form their characteristic loop.
By removing the flower stalk, you force the plant to redirect its energy away from seed production and into the developing bulb beneath the soil. If scapes are left on the plant, they eventually uncurl and stand straight up to produce clusters of tiny bulbils; however, allowing this to happen will significantly reduce the size of your final bulb harvest.
A Gourmet Delicacy in the Kitchen
Do not simply toss these clippings into the compost bin!
Garlic scapes are a coveted gourmet delicacy prized for their mild, nuanced flavor and a crisp texture similar to tender asparagus.
They are incredibly versatile in the kitchen and can be used in numerous ways:
- Gourmet Pesto: One of the most popular uses is blending them into a vibrant, garlicky pesto.
- Grilled or Roasted: Simply toss them with oil and salt and throw them on the barbecue or in the oven for a smoky, buttery, rich side dish.
- Sautéed or Stir-Fried: Chop them up and add them to stir-fries, pasta dishes, or omelets for a unique garlic "kick".
- Chopped Toppings: They can be finely chopped and sprinkled into quiches, scrambled eggs, or salads just as you would use green onions.
A Note on Elephant Garlic
While not a true garlic, Elephant garlic (which is technically a variety of leek) also develops scapes in the same manner as hardneck varieties.
These can be harvested and used culinarily just like traditional garlic scapes, offering a mild, delicious addition to your kitchen garden's bounty.
Precision Timing for Pruning Garlic Scapes
While it is known that you should snip scapes to redirect energy, there are specific physical markers to look for to ensure the best results.
You should prune the scapes when they are approximately six inches long or have just formed one full loop. At this stage, they are at their most tender, and the plant has not yet significantly diverted its resources away from the bulb.
If you wait until they uncurl and point straight up, the stalk will become woody, and the harvestable garlic bulb beneath the soil will be significantly reduced in size.
The Mystery of the "Bulbil"
If you choose not to prune a scape, it will eventually produce a flower-like cluster of bulbils, which are essentially tiny clones of the parent plant.
While these are not seeds in the traditional sense, they offer a fascinating garden experiment:
- Replanting: You can save and plant these bulbils in the fall, but be patient—it typically takes two full years for a tiny bulbil to mature into a harvestable, full-sized head of garlic.
- Culinary Punch: These bulbils are edible and can be sprinkled into dishes to add an intense, concentrated punch of garlic flavor.
Advanced Culinary Inspiration
Beyond basic grilling and pesto, scapes (and the flowering stalks of garlic-related plants) have a deep history in global cuisine that you can share with your readers:
- Garlic Scape Toum: A popular way to use a large harvest is to blend them into Toum, a light, airy, and incredibly potent Lebanese garlic sauce.
- Global Terminology: In Asian markets and Cantonese cuisine, these gourmet flowering stalks are sometimes referred to as gao choy fa. They are particularly prized because their sturdier structure allows them to hold their shape and crunch much better than garlic leaves during high-heat stir-frying.
- Pickling: If you have a large "bonus harvest" all at once, pickled garlic scapes are a delicious way to preserve that fresh, spring flavor for months.
A Reminder for Elephant Garlic
It is worth noting that while Elephant garlic is technically a leek, it also produces a tall seed stalk.
While gourmets sometimes disdain Elephant garlic for its milder flavor, its scapes are massive and can be prepared in the exact same way as hardneck scapes—making them easy for beginners to harvest and enjoy.
Harvesting Garlic and Curing the Bounty

After nearly eight to nine months in the ground, your garlic is finally ready to claim its place in your pantry.
In Southern California, a traditional rule of thumb is to harvest on the longest day of the year (the summer solstice), though your specific varieties will provide their own visual cues for when they have reached peak maturity.
When to Harvest: The Leaf Count Method
Timing is everything; harvest too early and the bulbs will be small, but wait too long and the protective skins can split, exposing the cloves and reducing storage life.
Watch for when the bottom one-third to one-half of the leaves have turned brown, while the top four or five leaves remain green. Each green leaf represents a potential layer of papery skin around the bulb, so harvesting while the top growth is still partially green ensures the bulbs remain tightly wrapped.
To facilitate a clean harvest, stop watering your crop one to four weeks before you plan to dig; harvesting from dry soil prevents rot and makes the bulbs easier to clean.
The Proper Technique: Lift, Don’t Pull
Never attempt to simply yank garlic out of the ground by its stem. Doing so can easily crack the bulbs or separate the stalk from the head, both of which invite rot and significantly reduce storage life.
Instead, use a garden fork or spade to gently loosen the soil approximately three inches away from the base of the plant. Pry the bulbs upward to lift them out of the earth, then carefully shake or brush off the loose soil.
Handle your garlic with care, as bulbs are extremely susceptible to bruising at this stage.
Curing Garlic: The Secret to a Long Shelf Life
Curing is the essential process of drying the bulbs to thicken their skins and harden the "necks," which prevents decay during storage. Move your garlic immediately into a cool, dark, and well-ventilated place—such as a covered porch, garage, or shed—and lay them out in a single layer or hang them in small bundles.
Avoid direct sun during this process, as intense radiation can "sunburn" the bulbs, causing the flavor and beneficial medicinal properties to deteriorate.
Let the bulbs dry for two to four weeks until the outer skins are papery and the roots are brittle. Once fully cured, you can trim the roots to half an inch and cut the stalks to about two inches above the bulb, unless you are growing softneck varieties and prefer to braid the pliable stems into decorative ropes.
Refined Maturity Markers
While the one-third leaf rule is a great baseline, different sources offer additional precision for identifying the perfect harvest window:
- The Six-Leaf Rule: Some experts specifically look for the bottom six leaves to be yellow or brown before lifting the bulbs.
- The 80% Marker: For certain varieties, a more aggressive indicator is to wait until 80% of the portion above ground has died back before beginning the harvest.
- The Summer Solstice Tradition: In mild climates like Southern California, a traditional rule of thumb is to plant on the shortest day of the year (winter solstice) and harvest on the longest day (summer solstice).
The "Peeling" Secret for Pristine Bulbs
For a professional, clean look without using water, try this technique:
- Initial Dry: After lifting the garlic, let the plants dry for two or three days in a shaded, well-ventilated spot.
- Strip the Layers: Once the surface is dry, carefully strip off the outermost two or three layers of leaves. This process removes all clinging soil and dirt, exposing the clean, white beauty of the bulbs underneath without the need for washing.
Professional Curing Setups
Ensuring maximum air circulation is the most critical part of the curing process to prevent rot:
- Screen or Pallet Drying: Instead of just laying them on a flat surface, place your bulbs on a screen or a wooden pallet. This allows air to reach the bottom of the bulbs, ensuring they dry evenly on all sides.
- The Bundle Method: If hanging your garlic, tie them in small bundles of 3 to 6 plants. Larger bundles can trap moisture in the center, leading to mold or decay.
- The "Sunburn" Warning: While it is tempting to leave garlic in the field to dry, Southern California's intense sun can actually "sunburn" the bulbs, causing their flavor and medicinal properties to deteriorate. Always cure in the shade.
Advanced Handling and Prep
- Handle Like Eggs: Garlic bulbs are extremely susceptible to bruising at harvest. Bruises act as entry points for disease, so you should never throw them into bins or handle them roughly.
- The Stalk "Plug": When trimming stalks for storage, leave at least one to two inches of dried stalk attached to the head. Cutting them too close to the bulb (flush with the cloves) can break the seal and lead to premature rotting.
- Root Trimming: Once the roots are completely brittle, trim them to about half an inch. This prevents them from drawing residual moisture back into the bulb during storage.
The Soil Moisture Factor
- Quality and Cleanliness: Garlic harvested from barely damp soil is of significantly higher quality than garlic pulled from wet earth.
- Emergency Protection: Because our region can have unexpected late-season rain, keep a tarp nearby to cover your garlic bed if a storm approaches just before your planned harvest date.
Garlic Storage and Preservation Methods

Once your garlic has finished curing and the outer skins are dry and papery, it is time to prepare it for long-term storage.
Properly stored garlic is a pantry staple that can last for many months, ensuring you have a steady supply of homegrown flavor until your next harvest.
Step 1: Preparation and Trimming
After the curing process is complete, you should prepare the bulbs for their final storage location. Use clean garden snips to trim the roots to about ¼ inch (6 mm) and cut the stalks to approximately 1 inch (2.5 cm) above the bulb.
If you are growing softneck varieties and prefer to keep them in braids, you can leave the dried stems attached. At this stage, you should also gently remove any remaining loose dirt and the very outermost layer of soiled papery skin, but be careful to keep the internal protective wrappers intact.
Step 2: Optimal Storage Conditions
The environment in which you store your garlic determines how long it will stay fresh and flavorful.
- Temperature: For the best results, store your garlic at room temperature, ideally between 65°F and 70°F. It should be kept in a cool, dark, and dry place away from direct sunlight.
- Airflow: Excellent air circulation is mandatory to prevent rot and mold. Avoid airtight containers; instead, store bulbs in mesh bags, woven baskets, or open paper bags with holes.
- Longevity: Depending on the variety, softneck garlic can last for up to nine months to a year, while hardneck garlic typically has a shorter storage life of four to six months.
Step 3: The "No Refrigerator" Rule
The single most important "pro tip" for garlic storage is to never store whole bulbs in the refrigerator. Cold temperatures (specifically those between 32°F and 45°F) mimic winter conditions and trigger premature sprouting, which rapidly degrades the quality and flavor of the cloves.
Step 4: Saving Your "Seed" for Next Year
One of the greatest rewards of growing garlic is that you never have to buy "seed" again. As you process your harvest, reserve your biggest and most perfect bulbs to be used as planting stock for the following autumn.
By selecting the largest cloves from your best-performing plants (I know it's hard!), you are performing natural selection in your own backyard, ensuring that each successive generation is better adapted to your specific Southern California microclimate.
Step 5: Alternative Preservation
If you find yourself with more garlic than you can use fresh, or if your stored bulbs are beginning to soften, there are several ways to extend their life:
- Garlic Powder: Dehydrate thinly sliced cloves until they are crisp, then blend them into a vibrant, homemade garlic powder that will last for up to a year.
- Freezing: You can freeze peeled cloves or slices in small, airtight containers for up to six months, though they are best used for cooking as their texture will soften once thawed.
- Pickling: If you enjoy the zing of preservation, garlic cloves can be pickled in vinegar or fermented in honey for a unique culinary and medicinal treat.
Advanced Storage Hacks
- The Best Containers: Beyond mesh bags, you can use reused egg cartons to hold individual bulbs, or hang them in onion sacks to ensure they receive the mandated 360-degree air circulation.
- Braiding Technique: If you are braiding softneck varieties, start the process as soon as you pull the heads from the ground while the stems are still pliable. If the leaves have already shriveled, a "pro secret" is to remoisten the stems slightly to soften them back up for easier plaiting.
- Storage Benchmarks: Help your readers manage their expectations by noting that while softneck garlic can last up to a year, hardneck varieties typically only have a shelf life of 4 to 6 months, so they should be used first.
The Math of a Perpetual Harvest
- The 20% Rule: To sustain a continual garlic harvest year after year without ever buying "seed" again, you should save approximately 20% (or one-fifth) of your total harvest for replanting. On average, one large bulb contains about five cloves worthy of planting to maintain the same crop size the following year.
Creative and Medicinal Preservation
- Honey Fermentation: A highly recommended preservation method for Southern California's "cold and flu season" is honey fermented garlic. Submerging cloves in raw honey creates a powerful medicinal and culinary treat.
- Garlic Salts: You can create "herbed salts" by blending fresh garlic with flaky sea salt and drying the mixture in the oven at a very low temperature (200°F) for 15 to 25 minutes until the salt is infused and dry.
- Garlic Oil Infusions: For immediate use, you can infuse vegetable oil with garlic and other spices like star anise or Sichuan peppercorns. However, the garlic should be removed once it starts to brown to prevent bitterness.
- Freezing "Pancakes": For a space-saving freezer hack, puree garlic with a small amount of olive oil and freeze it in flat stacks or "pancakes" inside freezer bags. This allows you to easily break off exactly what you need for winter soups and stews.
A Final Quality Check
- The Sprouting Warning: Remind readers that once garlic begins to wither or soften, its nutritive value and flavor decrease significantly. If they notice bulbs starting to soften in storage, that is the perfect time to pivot to dehydrating them for garlic powder.
Frequently Asked Questions on How to Grow Garlic
How long does it take to grow garlic?
Garlic is a slow-growing crop that typically takes 8 to 9 months to reach full bulb maturity. It is usually planted in the fall, overwintered in the ground, and harvested in late spring or early summer.
Can I just plant garlic from the grocery store?
While you can physically plant it, expert sources strongly caution against it. Supermarket garlic is often treated with growth inhibitors or irradiated to prevent sprouting, and it is frequently a variety (such as softneck silverskin from China) that may not be adapted to your local climate. It is best to purchase certified disease-free "seed" garlic from a reputable nursery or local farmers' market.
Can I grow garlic from a clove of garlic?
Yes, garlic is grown through vegetative propagation using individual cloves rather than traditional tiny seeds. When you plant one large, healthy clove, it will develop into a completely new, full-sized bulb containing multiple cloves.
What is the mistake in planting garlic?
One of the most critical mistakes is planting cloves upside down; they must be planted with the pointed "sprout" side facing up and the flattened "butt" side facing down to grow properly. Other common errors include planting in insufficient sunlight (garlic needs at least 6–8 hours), neglecting to weed—since garlic has shallow roots and competes poorly—and pulling the plants by their stems during harvest, which can crack the bulbs and invite rot.
Does garlic come back every year?
Garlic is technically a perennial plant, but it is almost universally cultivated as an annual in the garden. This means gardeners typically harvest the entire bulb at the end of the growing season and then replant individual cloves again in the fall to start a new crop. If a bulb or clove is accidentally left in the ground during harvest, it will likely resprout and return the following year.
You may also enjoy reading: