
How to Plant Potatoes

Growing potatoes is widely considered the gardening equivalent of a treasure hunt, as there is nothing quite like the thrill of digging into the earth to discover hidden tubers waiting beneath the surface.
Whether you are a student looking for an inexpensive, low-maintenance crop or a seasoned gardener seeking nutrient-dense, high-quality food, potatoes offer an incredibly satisfying and fascinating return on your labor.
Beyond the simple excitement of the harvest, growing your own spuds allows you to avoid the pesticides and growth inhibitors frequently found on store-bought varieties while opening the door to a stunning rainbow of colors and textures you will likely never find at a supermarket.
From the vibrant amethyst skin of a ‘Caribe’ to the deep blues and buttery golds of specialty varieties, the diversity available to the home gardener is a true culinary marvel.
There is something to be said of the ordinary magic in the cadence of tending the soil—the simple act of watching an "eye" sprout into a lush vine and eventually carrying a basket of fresh, crisp produce just a few feet from the garden to your table.
Today, I will walk you through every step of the process on how to plant potatoes, helping you transform your backyard, raised beds, or even just a simple bucket into a productive and beautiful edible landscape.
Choosing Your Potato Varieties
Choosing the right variety is the first step in a successful potato harvest, and potatoes (just like tomatoes!) are generally classified into two main growth categories: determinate and indeterminate.
Determinate varieties typically mature early to mid-season, usually within 60 to 100 days. These plants are more compact and produce their tubers in a single layer near the original seed potato.
Because of this growth habit, they generally require less hilling or mounding to keep the developing spuds protected from the sun. In fact, some early determinate varieties can be grown with minimal work if you are specifically looking for a quick crop of small "new potatoes".
On the other hand, indeterminate varieties are typically late-season or "main crop" potatoes that require a longer growing period, often between 100 and 135 days, or even up to 22 weeks.
These varieties are unique because they grow tubers in multiple layers along lateral stolons that emerge from the main stem as it grows upward. To maximize your yield and prevent the tubers from turning green and toxic due to sunlight exposure, indeterminate potatoes require significant and repeated hilling or mounding throughout the season.
By selecting a combination of early, mid-season, and late-maturing varieties, you can effectively stretch your harvest season to enjoy garden-fresh potatoes for more than six months.
Classification by Culinary Use: Waxy vs. Starchy
While skin color is often the first thing gardeners notice, the internal texture determines how you will use them in the kitchen.
- Waxy Potatoes: These varieties (often red-skinned) have a higher moisture content and a "glossy" mouthfeel. They hold their shape perfectly after cooking, making them ideal for boiling, roasting, or potato salads.
- Starchy Potatoes: A classic example is the Russet. These are high in starch and low in moisture, resulting in a fluffy, light texture that easily absorbs butter and cream. These are your go-to for french fries, baking, and smooth mashed potatoes.
- All-Purpose: Some varieties, like the Yukon Gold, strike a balance between the two and are versatile enough for almost any preparation. These are my personal go-to potatoes!
Beyond Red and White: A Rainbow of Options
The cool thing about home gardening is that it allows you to explore colors and varieties rarely found in grocery stores. This goes for potatoes, too!
- Specialty Colors: You can find varieties with blue or purple skin (like ‘Adirondack Blue’ or ‘Caribe’) and even some with vibrant purple or gold flesh.
- Fingerlings: These are long, skinny, "finger-shaped" potatoes, such as the 'Russian Banana' or 'French Fingerling', known for their unique shape and often rich, nutty flavor.
Disease Resistance and Regional Success
If you have limited space or live in a specific climate, choosing a variety with the right "pedigree" can save your harvest:
- Disease Resistance: Look for specific abbreviations in seed catalogs to protect your crop from common enemies like Late Blight (LB), Verticillium Wilt (V), or Scab (S). For example, the 'Kennebec' is a popular choice for its resistance to late blight.
- Yield Trade-offs: Generally, early-season varieties yield less than late-season varieties. If you have a long growing season, choosing late-maturing varieties will typically provide a larger bulk of potatoes for winter storage.
- Climate Matters: Some varieties are better suited for specific regions; for instance, in Florida, 'Red Pontiac' and 'Gold Rush' are frequently recommended for their performance in hotter climates.
Timing and Climate for Planting Potatoes
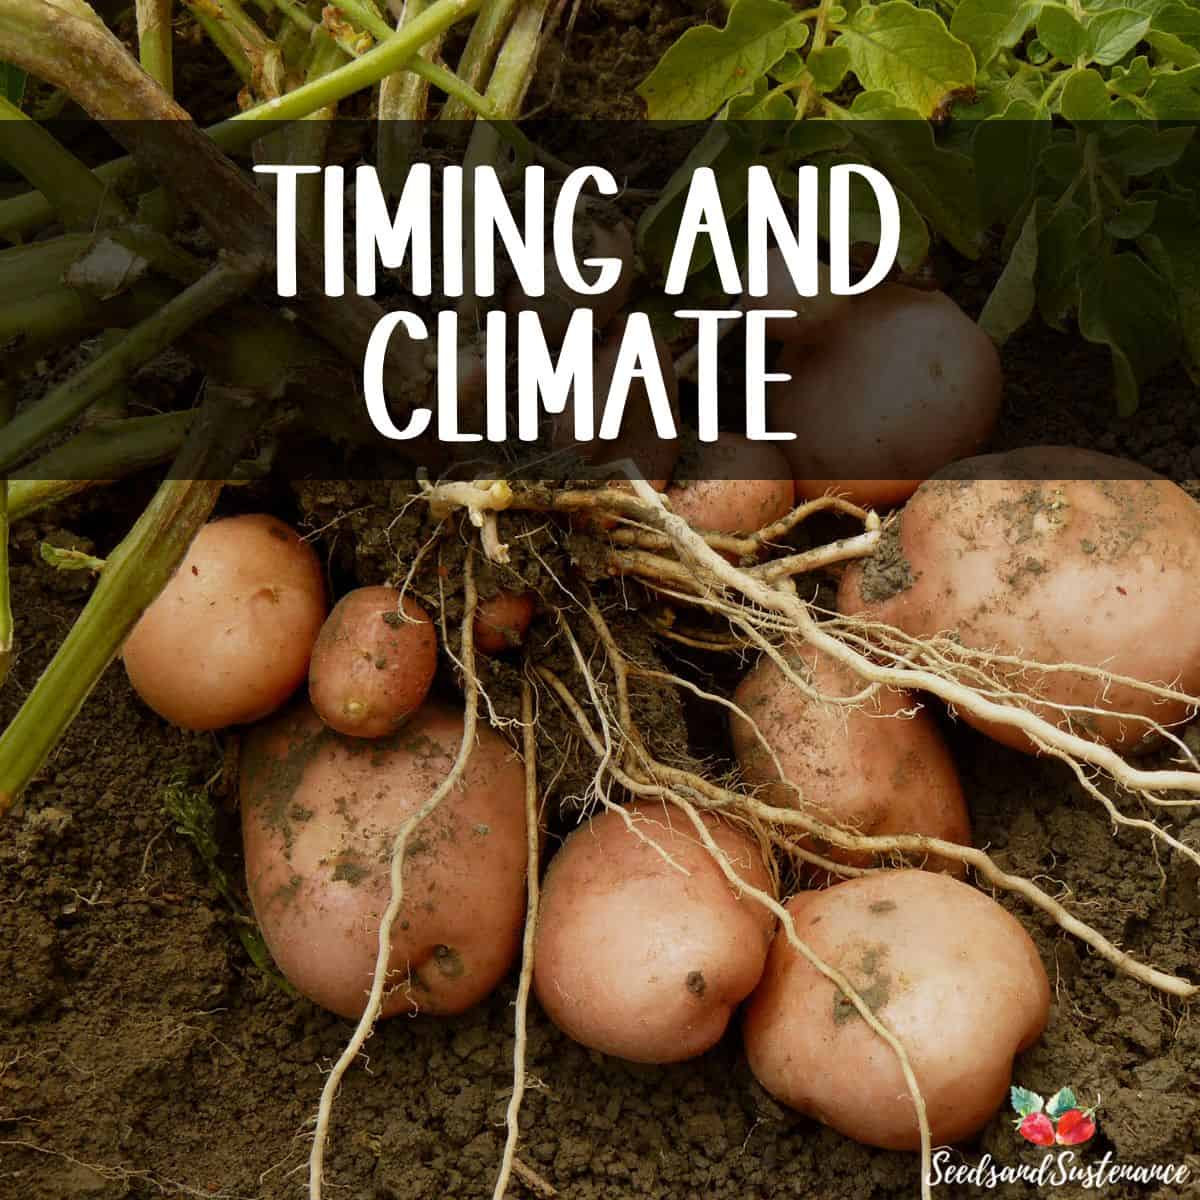
Soil Temperature and Growth
Success in potato gardening begins when soil temperatures reach at least 45°F. While this is the minimum temperature for planting, the ideal range for active growth is between 60°F and 70°F.
It is important to note that growth rates accelerate significantly as the soil warms; however, planting in soil that is too cold and waterlogged can cause the seed pieces to rot before they have a chance to sprout.
Frost Considerations
Understanding the difference between tuber and foliage hardiness is critical. While potato tubers are frost-hardy, the green growth is not. Potatoes can typically tolerate a light frost, but a hard freeze will kill young leaves and likely lead to a "rotten experience" for the gardener.
If a frost warning is issued after your leaves have emerged, you can protect the plant by covering the foliage with soil—a process where the leaves will grow back in a few days—or by using a physical barrier like an old sheet or frost cover.
While vines may regrow if burned by frost, the loss of that initial foliage often reduces the ultimate yield, so try to keep things covered if you can!
Calculating Planting Dates
- Cold Climates: In regions with distinct winters, aim to plant seed potatoes 2 to 4 weeks before the last expected spring frost. Sowing an early crop 5 to 6 weeks before the last frost is also possible because the soil acts as an insulator for the tubers if a freeze occurs before they emerge.
- Warm Climates (e.g., Florida or SoCal): In these regions, the goal is to time the harvest to avoid extreme summer heat and/or humidity, which potatoes dislike. For North and Central Florida, planting usually occurs between January and March. In South Florida, potatoes are often grown as a winter crop, with planting dates ranging from September through January to take advantage of the milder weather. In the South Coast region of SoCal, which includes San Luis Obispo County and all areas to the south, potatoes should be planted from February through May for an early crop and June through August for a late crop. If you are gardening in Southern California's desert valleys, such as the Imperial or Coachella valleys, the recommended planting window for white potatoes is December through February. In the interior valleys, planting typically occurs from February through March or during August.
Utilizing Microclimates for Season Extension
While the basic planting dates are essential, you can lengthen your growing season by actively managing microclimates.
Using tools like mini hoop tunnels or cold frames allows you to retain heat and protect young plants from harsh conditions, which is particularly useful for getting an earlier start in the spring or extending the harvest of early-season varieties into the fall.
Soil Temperature Regulation via Mulching
The sources emphasize that soil temperature is not just a factor at planting, but throughout the growing cycle.
Applying raw organic matter, such as straw or hay, as mulch serves a dual purpose: it regulates the soil temperature by keeping it cool during summer heat and helps maintain consistent moisture levels.
This prevents the soil from becoming too warm, which can otherwise halt tuber formation. Be sure to put on a good 4-5 inches around the base of your potatoes.
Sunlight Requirements
Potatoes are generally categorized as requiring significant sunlight for optimal tuber development.
When planning your garden layout, you should account for the path of the sun to ensure the plants receive the necessary hours of light to fuel growth - otherwise your yield will be disappointing.
Accelerating the Timeline with "Chitting"
To better time your harvest, especially in regions with shorter growing seasons, you can practice chitting (pre-sprouting) your seed potatoes.
This process involves placing them in a bright, cool area to encourage sturdy sprouts ("eyes") to form before they are even placed in the ground, effectively giving the crop a head start of several weeks.
Once they form, cut the potatoes into chunks (2-3 eyes for each chunk) and allow the pieces to air dry completely before planting. You can read more about this below!
Air Circulation and Disease Prevention
Climate management also involves managing air circulation.
High humidity combined with poor airflow can create a breeding ground for diseases like late blight and powdery mildew.
When timing your planting, ensure you provide adequate spacing between rows to allow the wind to dry the foliage, which is a critical environmental control against fungal pathogens.
Preparing Your Seed Potatoes

Source Quality
Your journey toward a bountiful potato harvest begins with high-quality, certified disease-free seed potatoes purchased from a reputable nursery or specialized vendor.
While it may be tempting to plant leftovers from your pantry, grocery store potatoes are often treated with growth inhibitors or hormones to prevent them from sprouting in the bag, which can lead to a failed crop.
Supermarket spuds may also carry hidden disease organisms that could contaminate your soil for years. If you choose to experiment with store-bought varieties, ensure they are organic, as these are typically free of sprout-inhibiting chemicals.
Chitting (Pre-sprouting)
To get a head start—especially if you live in a cold climate with a short growing season—you can practice chitting, or pre-sprouting.
This process wakes the tuber from dormancy and speeds up development once it is in the ground. Place your seed potatoes in a bright, cool spot, such as a windowsill, for two to three weeks before planting.
Ideally, the environment should be between 50°F and 70°F, with the potato "eyes" (the small depressions where sprouts form) facing upward. Once the white shoots reach about an inch long, they are ready to hit the dirt.
Cutting and Callusing
If your seed potatoes are large, you should cut them into 1.5 to 2-ounce chunks, which is roughly the size of a golf ball.
It is critical that each piece contains at least two to three healthy eyes, as these nodes are the points from which stems will grow toward the sun.
While large pieces produce more (but smaller) potatoes due to nutrient competition, smaller pieces tend to yield fewer, larger tubers. Note that very small seed potatoes can simply be planted whole.
After cutting, do not plant them immediately. Instead, let the pieces sit at room temperature for one to three days to allow the cut surfaces to dry and form a callus.
This "healing" time sends a signal to the potato that it is time to grow and serves as a vital shield to prevent rotting in the soil.
For an extra layer of protection, you can dust the cut pieces with sulfur (potato dust) to further safeguard them against decay-causing organisms.
The "Golf Ball" Rule and Yield Dynamics
While seed potato pieces should ideally be 1.5 to 2 ounces, a helpful rule of thumb is to aim for the size of a golf ball.
The size of your seed piece significantly impacts your harvest: smaller pieces generally produce fewer but larger potatoes, while larger pieces (or planting large tubers whole) result in a higher number of smaller potatoes because multiple shoots compete for nutrients.
If a potato is already golf-ball-sized, there is no need to cut it at all.
Hygiene and Tool Preparation
When cutting your seed potatoes, it is critical to use a sterilized knife. This precaution ensures that you do not inadvertently introduce pathogens to the fresh-cut surfaces, which could lead to rot once the piece is in the ground.
Advanced Chitting Techniques
- Ideal Setup: To keep seed potatoes upright and stable while chitting, use egg cartons or muffin tins. This ensures the "eyes" face the light consistently.
- Light Exposure: While a bright spot is necessary to encourage sturdy sprouts, you should avoid direct sunlight, which can dry out the seed pieces prematurely.
- What to Avoid: Look for firm, blemish-free tubers. While short, sturdy sprouts are the goal, you should avoid planting tubers that have already grown long white roots, as these have used a lot of their energy and are less vigorous.
Alternative Planting Methods for Immunity
One interesting technique I haven't tried is planting tuber pieces "upside down"—with the cut surface facing up and the sprout bud facing down.
The theory is that the sprout receives an appropriate level of stress as it grows around the tuber to reach the surface, which can make the plant more immune to diseases and changes in climate.
Sulfur and Rot Prevention
If you choose to use sulfur (often called "potato dust") to prevent rot, a standard ratio is 2 ounces of sulfur for every 10 pounds of potatoes.
You can place the cut pieces in a paper bag with the dust and gently shake it to ensure even coverage.
A Warning on Store-Bought Spuds
Avoid planting grocery store potatoes unless they are organic, as conventional varieties are treated with growth inhibitors, hormones, or irradiation specifically designed to prevent them from ever sprouting in your pantry—and they will likely fail in your garden as well.
How to Plant Potatoes

Ideal Soil Conditions
To ensure your potatoes have the "easy ability to form" their bulbous tubers, you must plant them in loose, well-drained, and airy soil.
Potatoes do not grow well in heavy clay; instead, they thrive in sandy or loamy soils that provide plenty of oxygen to the roots.
Before planting, enrich your garden bed with organic matter, such as a 2-inch layer of high-quality compost or well-rotted manure, which builds soil structure and provides essential nutrients.
Maintaining a slightly acidic pH between 5.0 and 6.5 is ideal, as higher alkalinity can encourage the development of common scab.
Traditional Trenching (Ridge and Furrow)
The most common in-ground method for planting potatoes is the ridge and furrow technique, which optimizes water usage and drainage.
- Digging the Trench: Create a 6-inch deep trench that is approximately 4 to 6 inches wide. If you are planting multiple rows, space the trenches 2 to 3 feet apart to allow plenty of room for hilling later in the season.
- Placement: Drop your seed pieces into the trench, spacing them 8 to 12 inches apart. Closer spacing will give you a higher volume of moderately sized potatoes, while wider spacing results in fewer but much larger "lunkers".
- Orientation: Always place the seed piece with the "eyes" or white sprouts facing upward toward the sun.
- Covering: Initially, cover the seed potatoes with about 3 to 4 inches of soil, leaving the rest of the trench to be filled in as the plants emerge and grow.
Alternative Methods
If you have limited space, poor native soil, or simply want to avoid heavy digging, these alternative growing methods offer excellent results:
- Container Gardening: This is a fantastic option for balconies or patios using barrels, 5-gallon buckets, or specialized potato bags. Ensure the container has several drainage holes drilled in the bottom to prevent root rot. Fill the container with about 6 inches of potting soil, place your seed potatoes on top, and cover them with another 3 inches of soil. As the green sprouts emerge, continue adding soil or mulch until the container is full.
- Ruth Stout (Straw) Method: This "no-work" method involves placing seed potatoes directly on the surface of loosened soil and covering them with a thick, 12-inch layer of straw or hay. The straw provides excellent moisture retention and protects the tubers from sunlight. Harvesting is as simple as pulling back the straw to find your "buried treasure" sitting right on the soil surface.
- Potato Towers: To maximize yield in a tiny footprint, you can build a vertical tower using wire mesh or cinder blocks. For a wire tower, create a cylinder 18 to 24 inches wide and 2 to 3 feet tall, lining it with landscape fabric. For a cinder block tower, stack the blocks in a square. In both versions, you layer soil, compost, and seed potatoes, continually burying the stems as they grow upward until the tower is filled to the top.
Advanced Spacing and Yield Dynamics
While basic spacing is essential, you can tailor your garden to your specific culinary needs by adjusting the density of your planting.
Closer spacing (6 to 8 inches apart) will yield a higher volume of smaller, moderately sized potatoes. Conversely, wider spacing (12 to 14 inches apart) results in fewer tubers, but they will be significantly larger "lunkers".
If you are planting in large beds, aim for 12-inch spacing in every direction to maximize your footprint.
The "Upside Down" Technique for Immunity
A unique method for increasing a plant's resilience is to plant the seed potatoes "upside down"—with the cut surface facing upward and the sprout buds facing downward.
As the sprouts grow around the tuber to reach the surface, they receive an appropriate level of stress, which can make the resulting plant more immune to diseases and better able to handle climate changes. An added benefit of this method is that it typically produces only a few strong sprouts, which eliminates the need for thinning later.
High-Yield Soil Preparation (The "Fertility Ditch")
For the highest possible production, you can go beyond basic trenching by creating a deep fertility zone.
Excavate a trench one shovel blade wide and nearly one shovel blade deep. Place your fertilizer or high-quality compost directly into this ditch and dig it in an additional shovel’s length deeper. This places the nutrients well below the seed piece, right where the main root system will form, encouraging massive growth.
Biological Soil Fumigation and Companion Planting
You can use nature's own chemistry to protect your potatoes:
- Broccoli Residue: Planting potatoes in a bed where broccoli was recently harvested can significantly minimize diseases like common scab. Broccoli residue contains compounds that, when broken down in the soil, act as a biological fumigant or disinfectant.
- "Living Mulch" Weeds: Allowing specific weeds like fat hen or amaranth to grow alongside your potatoes can help retain moisture and prevent soil-borne diseases. These deep-rooted plants prevent dirt from splashing onto the potato leaves, which is a primary cause of blight.
Plastic Mulch and "X" Planting
For gardeners in cooler climates who want a jump on the season, black polyethylene mulch or landscape fabric (I prefer this method) can be used to warm the soil quickly.
Secure the film over your prepared bed and use a tool to poke holes or cut an "X" through the material. Plant your seed potatoes directly through these openings to lock in heat and moisture while almost entirely eliminating weeding chores.
Specific Container Tips
When using the bucket method, start by filling the container only ⅓ to ½ of the way with soil. Bury the seed potato about 2 to 3 inches deep within that initial layer. This leaves ample room to continue adding soil as the plant grows, which is essential for maximizing the vertical space where the potatoes will actually form.
Always make sure to drill several drainage holes in the bottom to prevent the seed pieces from rotting.
Essential Potato Care and Maintenance
Hilling (Earthing Up)
Once your potato plants reach 4 to 10 inches in height, it is time to perform the critical task of hilling, or "earthing up".
Using a hoe or garden fork, pull loose soil or organic mulch (like straw) up and around the base of the plant, leaving only the very top leaves exposed.
This process should be repeated at least twice as the plant grows, ideally every few weeks until the plant begins to produce blossoms.
There are several vital reasons to hill your potatoes:
- Encouraging Growth: It creates a loose, airy medium that makes it easier for tubers to bulbously form and expand underground.
- Preventing Greening: Tubers exposed to sunlight produce chlorophyll and a glycoalkaloid called solanine, which turns the potato green and makes it bitter and toxic. Hilling ensures they remain buried in darkness.
- Increasing Yield: For indeterminate varieties, hilling encourages the stem to sprouttubers on multiple levels, significantly increasing your total harvest.
- Disease Protection: Mounding soil can help prevent late blight spores from washing down from the leaves onto the developing tubers.
Watering Habits
Potatoes require consistent moisture to produce high-quality, smooth tubers. Generally, you should provide 1 to 2 inches of water per week. While the soil should be kept moist, avoid saturated conditions that can lead to root rot.
Timing and technique are key to watering success:
- Critical Tuber Formation: Maintaining uniform moisture is most essential once flowers appear, as this is the exact moment tubers begin to develop.
- Disease Prevention: To reduce the risk of foliar diseases like blight, water at the base of the plant rather than from above, and try to water in the early morning so any splashed leaves can dry before nightfall.
- Avoiding Deformities: Inconsistent watering—alternating between bone-dry and soaking wet soil—causes potatoes to become rough, knobby, or develop cavities known as "hollow heart".
- Harvest Preparation: Gradually cut back on watering about two weeks before harvest to allow the potato skins to toughen for better storage.
Fertilization
To achieve a heavy harvest, potatoes need the right balance of nutrients, represented by the N-P-K (Nitrogen, Phosphorus, and Potassium) numbers on fertilizer packaging.
While potatoes are medium-demand vegetables, they require specific attention to the type of growth being encouraged.
- Choose the Right Ratio: Use a balanced fertilizer (like 10-10-10) or a low-nitrogen, high-potassium mix (like 8-0-8).
- Avoid Excessive Nitrogen: While nitrogen encourages leafy green growth, too much of it will result in lush vines but very few tubers. High phosphorus and potassium levels are necessary to direct the plant's energy into the storage organs—the potatoes themselves.
- Side-Dressing: For an extra boost, you can side-dress your plants midway through the season by sprinkling fertilizer alongside the rows and lightly scratching it into the soil.
- Organic Options: Well-rotted compost, bone meal (for phosphorus), and kelp meal (for potassium and trace minerals) are excellent organic alternatives to synthetic fertilizers.
Advanced Hilling Nuances
- The Quarter-Growth Rule: When hilling, a key technique is to never cover more than one-quarter of the new growth at a time. This ensures the plant has enough exposed foliage to continue photosynthesis while building the mound.
- Variety-Specific Hilling: While indeterminate varieties require repeated hilling to support multiple layers of tubers, determinate varieties typically only need a second hilling to be successful.
- Thinning for Size: If your seed potatoes produce too many sprouts, the resulting tubers may stay small due to competition. To grow larger potatoes, thin out weak sprouts to leave only two to three strong plants per spot.
- Knowing When to Stop: You should continue the hilling process until the vines begin to fall over, at which point further hilling is no longer possible.
Strategic Watering and Moisture Control
- Morning Rituals: Always aim to water in the early morning and exclusively at the base of the plant. This allows any accidental splashes on the leaves to dry before nightfall, which is a critical defense against moisture-related fungal diseases.
- Uniformity is Key: Potatoes are particularly sensitive to moisture fluctuations. Alternating between bone-dry and soaking wet soil leads to knobby or rough tubers and internal cavities known as hollow heart.
- The Critical Window: While consistent moisture is always important, it is most vital starting two weeks after the plants emerge and continuing through the flowering stage when tubers are actively forming.
Nutrient and Soil Health Management
- The Dusk Rule for Fertilizing: If you are applying liquid fertilizers or "side-dressing" (sprinkling fertilizer near the stems), do so at dusk. This prevents the midday sun from causing the fertilizer to "burn" the plant’s leaves or roots.
- Protecting the Soil Food Web: To maintain a healthy garden ecosystem, use organic fertilizers with NPK numbers below 10. High concentrations of phosphorus (the middle number) can actually kill beneficial mycorrhizal fungi that help the plants absorb nutrients.
- A Warning on Manure: While compost is excellent, many experts recommend avoiding fresh manure in potato beds, as it can significantly increase the risk of common scab.
Integrated Pest and Disease Maintenance
- Straw as a Shield: Mulching with straw does more than retain moisture; it provides a habitat for beneficial predators that eat the larvae of the Colorado Potato Beetle.
- Living Mulch: Allowing specific deep-rooted weeds like fat hen or amaranth to grow sparingly can act as a "living mulch" that prevents dirt from splashing onto the leaves—a primary cause of blight.
- Physical Removal: For a family-sized garden, the sources suggest that vacuuming up beetles with a small handheld vacuum or hand-pulling them is a highly effective chemical-free maintenance chore.
Troubleshooting - Pests and Diseases

The Arch-Enemy: Colorado Potato Beetle
Widely considered the arch-enemy of potato growers, the Colorado potato beetle is easy to identify by its vibrant orange-red color and black-and-cream striped back.
Both adults and their brownish larvae are voracious feeders that can almost completely defoliate your plants if left unchecked. For the home gardener, handpicking beetles in the morning when they are slower or using a handheld vacuum is a highly effective, chemical-free management strategy. You can also protect young plants by installing floating row covers immediately after planting, which prevents flying adults from reaching the vines to lay their eggs.
Biological controls like Bacillus thuringiensis (BT) spray specifically target young larvae, while releasing natural predators like ladybugs or lacewings provides excellent environmental control.
Common Diseases
- Late Blight: This devastating fungal-like pathogen, famously responsible for the Irish potato famine, causes large, dark brown, watery blotches on leaves that can spread rapidly in warm, wet weather. Once symptoms like mushy tubers or collapsing stems appear, you must remove and destroy infected plants immediately by burning or bagging them; never add them to your compost pile, as spores can survive and overwinter. To prevent spores on the leaves from washing down and infecting the tubers, practice deep hilling to create a thick soil barrier. Selecting blight-resistant varieties and practicing a strict three-year crop rotation are also essential preventative measures.
- Common Scab: Scab manifests as dark brown, rough, scruffy patches or pits on the surface of tubers, though the potato itself usually remains perfectly edible. This soil-borne bacterium thrives in dry, neutral, or alkaline soil conditions. You can prevent scab by maintaining a soil pH between 5.0 and 6.5 and avoiding the use of lime or fresh manure in your potato beds. Interestingly, tilling broccoli residue into your garden soil can act as a "biological soil fumigant" to further minimize scab outbreaks.
Environmental Disorders
Hollow Heart Hollow Heart is characterized by star-shaped or irregular brown cavities at the center of the tuber, which are often only discovered after the potato is cut open.
This disorder is not caused by a pathogen but rather by inconsistent growing conditions, such as a sudden growth spurt triggered by heavy watering or rain following a period of drought.
To avoid this, you should maintain uniform soil moisture throughout the season by watering regularly and incorporating organic matter to improve soil water retention. You should also avoid overfertilizing your plants, as excessive nutrients can cause the tubers to grow too rapidly, increasing the likelihood of internal cavities.
Additional Pests to Watch For
- Potato Psyllids: These tiny, winged insects cause leaves to curl upward and turn yellow or purple. A unique sign of infestation is the production of aerial tubers (tubers growing on the stem above ground) and a "rosetted" appearance of new foliage.
- Potato Tuberworms: These larvae tunnel directly into the tubers, leaving pinkish excrement near the "eyes". Tunneling may also be visible in the stalks and leaves.
- Leafhoppers: These lime-green insects inject an enzyme while feeding that cause "hopperburn," where leaves wrinkle, cup, and turn brown at the tips, significantly stunting growth.
- Flea Beetles: These minuscule jumping beetles chew tiny, round holes that make leaves look like they were "shot full of holes". While established plants can often outgrow the damage, it can be fatal to young plants.
- Wireworms and Slugs: These soil-dwellers attack the tubers directly. Wireworms (click beetle larvae) create narrow tunnels, while slugs chew circular holes that often open into large internal cavities.
- Mice and Rodents: These animals will burrow through loose garden soil specifically to feed on the starchy tubers.
Secondary Diseases and Disorders
- Early Blight (Alternaria): Unlike late blight, this fungal infection typically starts as target-like brown or black spots on the lower, older leaves. If left unchecked, the leaves eventually turn yellow and drop off.
- Fusarium Dry Rot: A major issue for stored potatoes, this fungus causes sunken, wrinkled depressions on the skin that may be lined with white fungal growth.
- Verticillium Wilt: This soil-borne fungus causes sudden wilting of one part or the entire plant. A key diagnostic sign is brown streaks inside the lower stem when it is split lengthwise.
- Corky Ring Spot: Spread by soil nematodes, this virus creates raised, corky growths on the skin and curved brownish bands inside the flesh of the tuber.
- Potato Silver Scurf: This soil-borne fungus causes pale, silvery patches on the skin. While it may look unappealing, the eating quality of the potato remains unaffected.
Advanced Management Strategies
- Biological Soil Fumigation: Planting potatoes in a bed where broccoli was recently harvested can minimize diseases like common scab. Broccoli residue contains compounds that act as a natural disinfectant when mixed into the soil.
- Beneficial Nematodes: Specific species like Steinernema and Heterorhabdtis can be watered into the soil to hunt and kill the larval stages of potato beetles, flea beetles, and wireworms.
- The Handheld Vacuum Method: For pests too small or numerous to handpick, such as flea beetles or young potato beetle larvae, using a handheld vacuum is a highly effective non-chemical control.
- Sterilization and Hygiene: Always use a sterilized knife when cutting seed potatoes to avoid introducing pathogens. Also avoid touching your plants when they are wet with dew or rain, as this is a primary way diseases like blight are spread by human contact.
- Trap Cropping: Planting "sacrificial" crops like nasturtiums or borage nearby can lure aphids away from your potato vines. This is one of my favorite methods!
Harvesting and Curing Potatoes for Storage

Early Harvest: The "New Potato" Treat
If you cannot wait for the full maturity of your crop, you can begin an early harvest of "new potatoes" as soon as the plant's pretty, star-shaped flowers begin to bloom.
These young tubers are typically about the size of an egg or slightly larger. New potatoes have exceptionally thin, delicate skins and a crisp, juicy texture that is far superior to store-bought versions.
Because their skins have not yet toughened, they should be eaten immediately after harvest, as they do not store well. You can often "tickle" these out by reaching into the loose soil at the sides of the vines without harming the rest of the developing crop.
The Main Harvest: Timing is Everything
For your primary storage crop, patience is the ultimate virtue. You must wait until the foliage has completely yellowed and died back naturally in early autumn. Once the vines have browned off, the plant has finished translocating all its nutrients and sugars into the tubers.
- Toughening the Skins: After the tops die, leave the tubers in the ground for an additional 10 to 14 days. This waiting period is critical because it allows the skins to dry and toughen, which significantly increases the quality and potential length of storage.
- Watering and Weather: Gradually reduce irrigation two weeks before you plan to harvest to assist in the toughening process. When the big day arrives, aim for a warm, cloudy day during a dry period, as harvesting in wet conditions can lead to rapid rot and the spread of disease.
The Digging Process: A Gentle Touch Harvesting is often described as a "treasure hunt," but it requires a careful hand to avoid damaging your bounty.
- Ideal Tools: A lifting or turning fork is highly recommended over a traditional shovel. The flat, pointed bars of a lifting fork allow you to slide beneath the roots and lift the tubers out with minimal bruising or nicking.
- Technique: Insert your tool into the soil around the outer perimeter of the plant and gently lever the earth upward. Once the soil is loosened, you can usually grub around by hand to find the tubers hidden deep at the bottom or along the sides of the hole.
- Handle with Care: Always handle potatoes gently; tiny scratches or cuts serve as entry points for disease and will cause the tubers to rot quickly in storage.
Curing and Storage: Preparing for the Long Haul
Before your potatoes move into their final storage home, they must be cured.
- The Curing Phase: Place the tubers in a single layer in a dark, well-ventilated area for about two weeks. The ideal temperature for curing is between 50°F and 65°F. This process allows any minor nicks to heal and further thickens the skin.
- Long-Term Storage: Once cured, store your potatoes in a cool, dark, and dry place, ideally around 40°F to 50°F. Using containers that allow air circulation, such as cardboard boxes with holes, woven baskets, or mesh bags, is essential to prevent moisture buildup.
- Pro-Tips for Longevity: Do not wash your potatoes before storage, as the added moisture can trigger rot; instead, simply brush off large clumps of dry soil. Also, avoid storing potatoes near ripe fruits like apples or bananas, which release ethylene gas that can cause your spuds to sprout prematurely.
Safety Warning: Beware the Green
Always inspect your potatoes before eating. If tubers are exposed to sunlight, they produce chlorophyll and a toxic glycoalkaloid called solanine, which turns the skin green and the flesh bitter.
Do not eat any green parts or sprouts, as solanine can cause nausea, vomiting, and other signs of poisoning. It is important to note that heating or cooking does not destroy this toxin, so green areas must be completely removed or the potato discarded.
Yield Expectations and Sizing
- The "Lunker" Spacing: If your goal is to harvest massive "lunkers," ensure you use wider spacing (12–14 inches) during planting, though this may slightly lower your total numerical yield.
- Yield Ratio: When using certified disease-free seed, you can generally expect a return of approximately 25 pounds of potatoes for every 1 pound of seed sown; using non-certified seed often cuts this yield in half.
- New Potato Growth Rate: Once the plant begins blooming, "new potatoes" can grow one size larger every few days, so checking them frequently will help you catch them at your preferred culinary size.

Advanced Harvesting Techniques
- Base-Level Cutting for Blight: If your plants are infected with late blight, cut the foliage down to ground level immediately and dispose of it. Wait two weeks before digging the tubers to ensure the skins have toughened sufficiently to resist the spores during harvest.
- The 1-Hour Dry: After digging your potatoes, let them sit on top of the soil to dry for one to two hours before moving them into dark storage. However, do not leave them in direct sun for more than an hour, or they may scald, which reduces their storage life.
Storage Chemistry and Logistics
- The 40°F Sweet Spot: While the ideal storage temperature is 40°F, there is a chemical trade-off to consider. If the temperature drops below 40°F, the starch in the potato converts to sugar, resulting in a noticeably sweet taste. Conversely, temperatures warmer than 40°F will increase the potato's tendency to resprout prematurely.
- Ethylene Danger: Never store your potato harvest near ripe fruits like apples or bananas, as these release ethylene gas, which acts as a ripening agent and will cause your potatoes to sprout.
- Extending Shelf Life: If your stored potatoes do begin to sprout, you can extend their usability for another five to six weeks by simply rubbing off the sprouts as they appear.
Alternative Preservation Methods
- Flash Freezing: For quick kitchen use, you can dice potatoes and "flash freeze" them by spreading the pieces in a single layer on a cookie sheet overnight. Once frozen individually, they can be bagged together without clumping, making them easy to pour out for recipes like breakfast burritos.
- Long-Term Options: Beyond the root cellar, potatoes are well-suited for pressure canning, dehydrating, or freeze-drying.
Critical Safety Warning: Potato Berries
- The "False Tomato": Some potato varieties produce small green seed balls that resemble cherry tomatoes or tomatillos. It is vital to warn readers that these "potato berries" are highly toxic due to high solanine content and must never be eaten; they should be removed and kept away from children and pets.
Growing potatoes is more than just a garden chore; it is an ordinary magic that connects you to the soil and the natural cadence of the seasons. From the first green sprout to the final "treasure hunt" in the dirt, the entire process is a fascinating voyage of discovery, fulfillment, and resilience.
By taking control of your food source, you're growing nutrient-dense produce that is free from unknown chemicals and truly tastes homegrown.
Frequently Asked Questions About Planting Potatoes

Q: Can you grow a potato from a potato?
A: Yes, you can easily grow food from the roots and shoots of vegetables purchased at a grocery store. Gardeners often use "seed potatoes," which are tubers that have sprouted "eyes," to start new plants. For instance, even large baking potatoes with healthy eyes can be successfully planted in large patio planters.
Q: What is the best way to plant potatoes?
A: A good rule of thumb is to ensure your seed potato or cut pieces are approximately golf-ball-sized. If a seed potato is already this size, there is no need to cut it; however, if it is too large, it may send out multiple shoots that compete for nutrients, resulting in a harvest of many small potatoes. As the plants grow, they require hilling, a process of mounding soil around the base; while determinate varieties may only need a second hilling, indeterminate varieties require additional hilling throughout the season.
Q: What months can you plant potatoes?
A: While specific timing can vary by location, planting often occurs in the spring to ensure a productive crop. Most vegetables, including potatoes, are classified as annual crops because they must be replanted each year.
Q: How many potatoes do you put in each hole?
A: You generally plant one seed potato piece per station, provided it is roughly the size of a golf ball. This sizing helps the plant manage nutrient intake without producing excessive, competing shoots.
You may also enjoy reading:
The Best Companion Plants for Okra
How to Get Rid of Cabbage Worms

